Why, an air cored resonant transformer that shoots lightning of course! What is that, you ask? The most important part is resonance. Resonance is like pushing a swing. If you were to push the swing at a random time in it's motion, it would probably stop, or slow down, and you might even get hit in the face. That would be because you're not pushing it at it's resonant frequency. If you push the swing when it's at the highest point in it's motion, then it will go higher each time. I found a monkey on the internet that explains the concept for me.
As you can see, that monkey is not pushing the ball at the top of it's swing. Instead, he is pushing whenever he wants, and the ball is not always there to receive the energy, so it stops.
Now this monkey has figured out that if you push the ball at the top of it's swing, it goes higher each time. The frequency at which the monkey pushes the ball is known as the resonant frequency.
So now you're wondering what a swing has to do with lightning. Well, a tesla coil works like a swing, except with electricity. In a tesla coil, there are two coils, the primary and the secondary. The secondary coil has it's own fixed resonant frequency, much like the swing, and the primary coil is designed to match this frequency, like the person pushing the swing. This causes the coil to resonate up to higher and higher voltages, which break out of the topload of the coil, which can be a toroid (doughnut), sphere, disc, point, or any other simple shape.
But wait, how does a coil of wire have a resonant frequency? You've probably realized that the coil doesn't swing back and forth, so where does the frequency come from? The answer involves 2 of the basic elements of electronics, inductance and capacitance.
Inductance is the property of something to resist change in current flow because of the creation of a magnetic field. Most normal wires have such low inductance that the effect is not noticeable, but when you create a coil the inductance is increased significantly and is useful. Coils also have the property of increasing the magnetic field around it, like an electromagnet. In doing so, large amounts of energy can be stored in the magnetic field.
Capacitance is the compliment of inductance. Rather than energy stored in a magnetic field, capacitance is energy stored in an electric field. This happens when you have two surfaces held close together. When a negative voltage is applied to one surface, electrons rush onto the surface and create a negative charge. This negative charge pushes away the electrons on the opposing surface, causing a positive charge on that surface. If both plates are then disconnected, the charge will remain, thus the energy is stored in the capacitor.
Once you have an inductor and a capacitor, you can put them together to get an LC resonance circuit; L being the symbol for inductance (apparently in honor of the physicist Heinrich Lenz) and C being the symbol for capacitance. An animation can explain this process much better than words, but essentially, the energy in the capacitor is dumped into the inductor until the capacitor is empty. Once this happens the field created by the inductor collapses back into it and the energy is dumped back into the capacitor. Rinse and repeat.
Well, first you need to know that it's dangerous. As in, if you mess up and touch things you shouldn't, like the capacitor, it can stop your heart. That kind of dangerous. If you think it's cool enough that you want to make one anyway, welcome to the club, lets get started with a schematic.
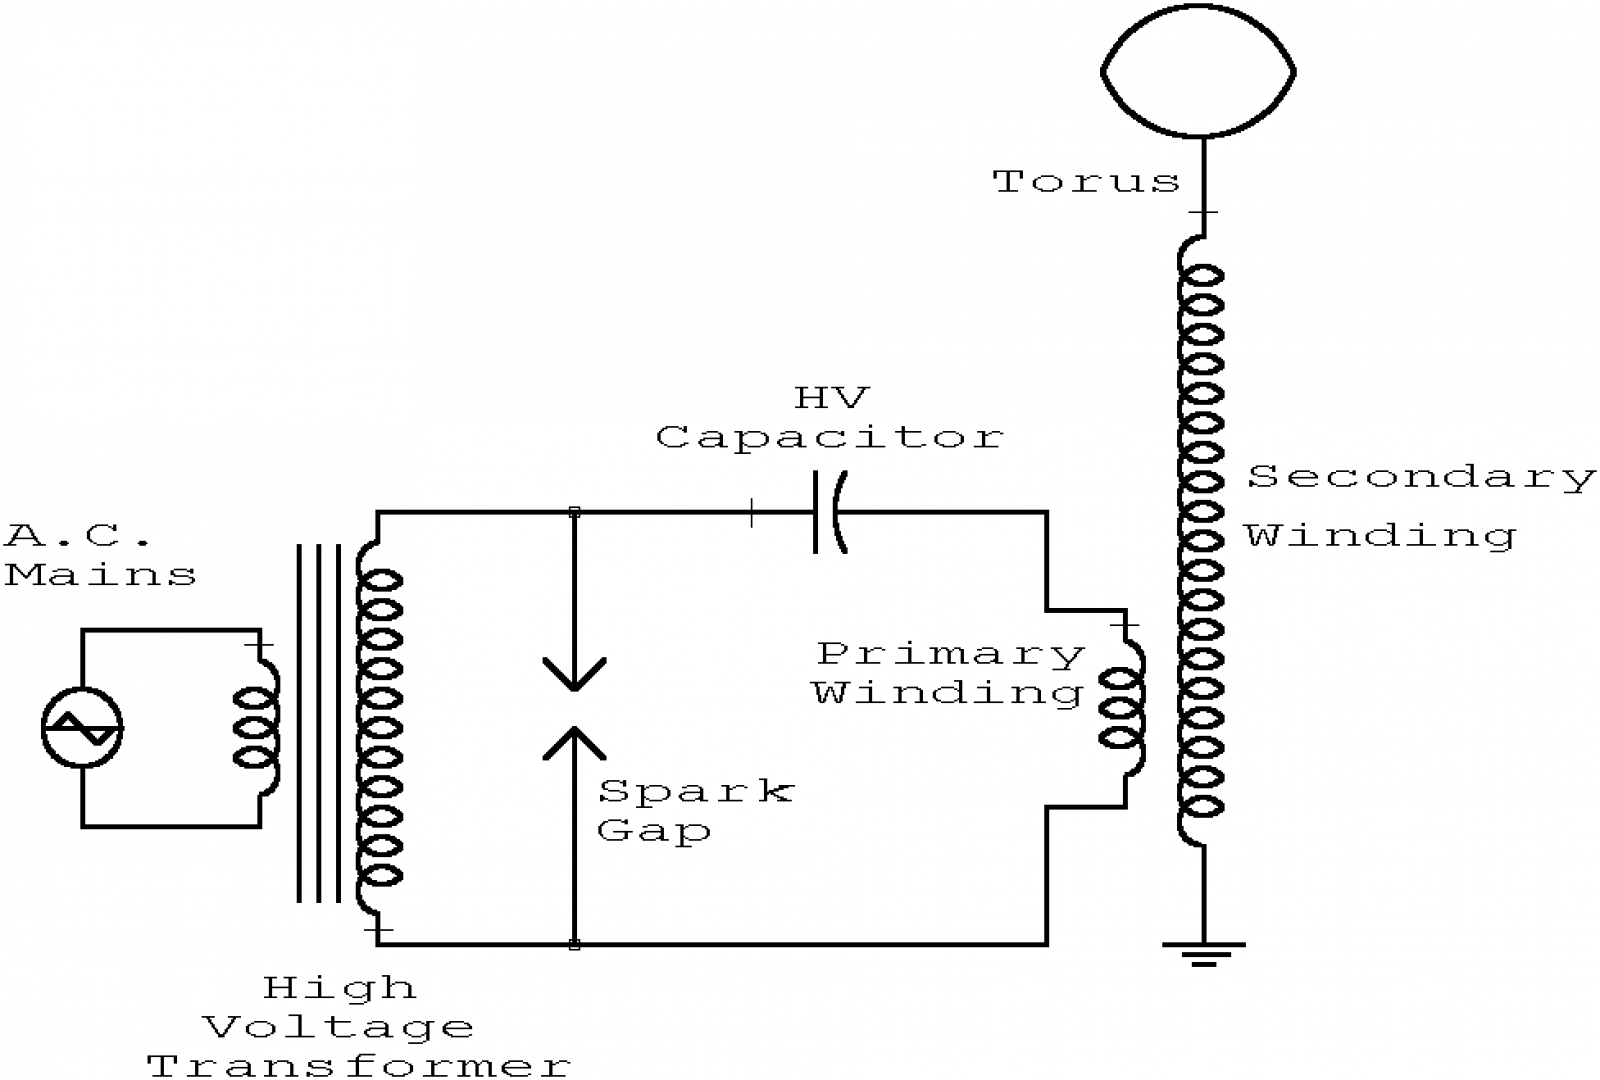
Here's a general overview of what happens. The 120V AC on one side of the NST causes a 15000V AC wave to be created on the other side. This charges the capacitor up until the voltage gets high enough to fire the spark gap. When the gap fires, it acts as a short circuit, allowing the capacitor and inductor to resonate. This causes the magnetic field of the inductor to create a current in the secondary coil, which resonates along with the primary, until sparks form and the energy is dissipated. When the voltage drops low enough in the primary, the gap is quenched, and the cycle repeats.
The schematic is divided into 2 parts, the primary, and the secondary. As you can see from the schematic, the first thing you'll need for the primary is a high voltage
#transformer. Options include the
#microwave-oven-transformer,
#X-ray-transformer,
#neon-sign-transformer, or
#pole-pig; with neon sign transformer being the most common by far. I used the same transformer I used for the
#Jacobs-Ladder. The length of the sparks you can create will depend on the power of the transformer you choose, based on the equation:
Inches = 1.7 * sqrt( Watts )Keep in mind that if you make a monster coil capable of firing off 10' sparks, you need a place to run it. And if you live in a populated area, you might get the cops called on you, because they can get LOUD. Other than that, go big or go home. Generally, a NST can put out about 2-3 foot sparks, and is a good place to start. If you're too lazy to do the math, Deepfriedneon.com has a nice calculator to do it for you.
The secondary coil geometry is defined by the power of your coil. Generally a <500W coil needs a secondary 3-4 inches in diameter and 18-20 inches high. A 500-1500W coil needs a secondary 4-6 inches in diameter and 20-24 inches high. 1500-3000W needs one 6-10 inches across and more than 2 feet tall. Any bigger than that and you're looking in the wrong place for information.
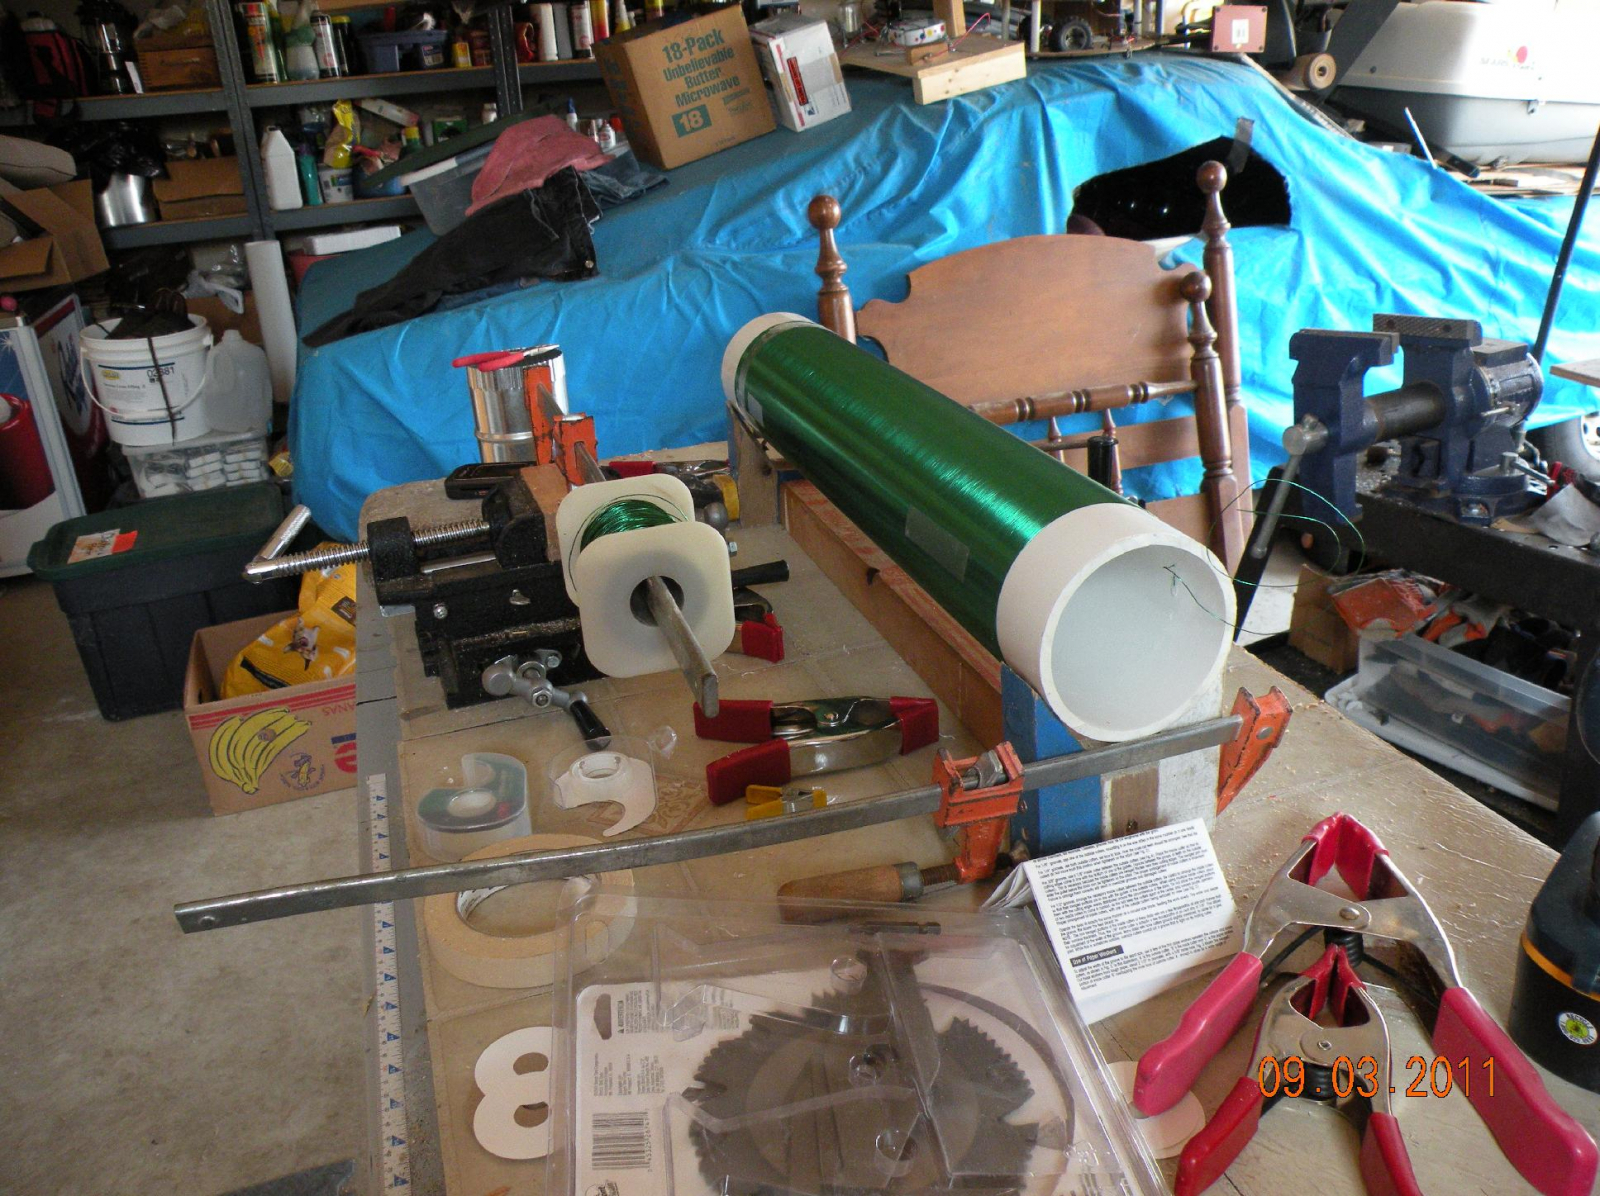
Building a secondary coil is pretty straightforward. First, you do some math to find out what diameter wire you need to get ~1000 turns on in the desired length. Then take into account that the enamel coating takes up 10% of the wire thickness. Then look up a table to find the gauge of wire that is that diameter. Then find the length of wire needed. This can be done using the helical coil calculator here
http://deepfriedneon.com/tesla_frame6.html . Once you get ahold of the needed wire, either through an online store or a local supplier, and the appropriate PVC form, it's time to start winding. A lathe is ideal to hold it, but something can be built out of wood without too much trouble.
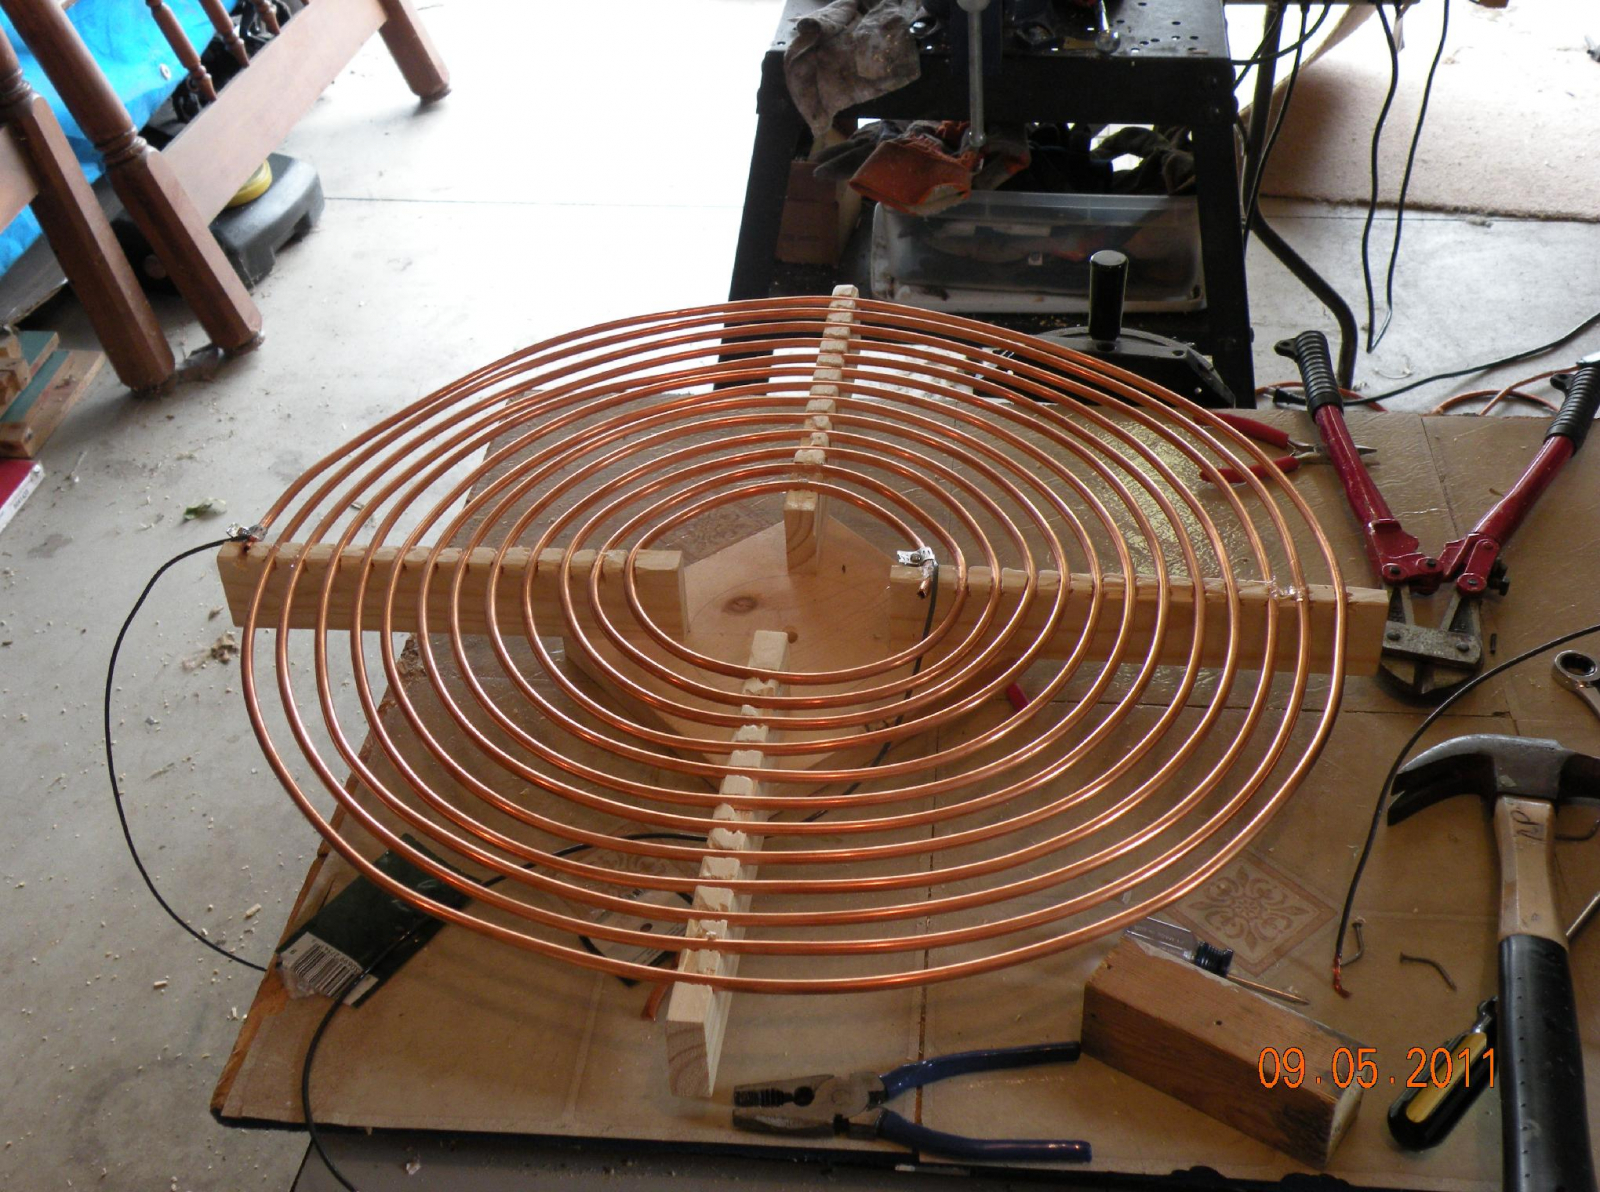
Now it's finally time for the primary coil. A 50 foot spool of 1/4" copper tubing from the home improvement store should be sufficient. Construction is pretty self explanatory once you look at a picture.
Simply use a calculator such as the deepfriedneon one to determine the dimensions necessary for the desired inductance, and add a turn or two so you can make adjustments later. How do you know what inductance you desire? I'm getting to that.
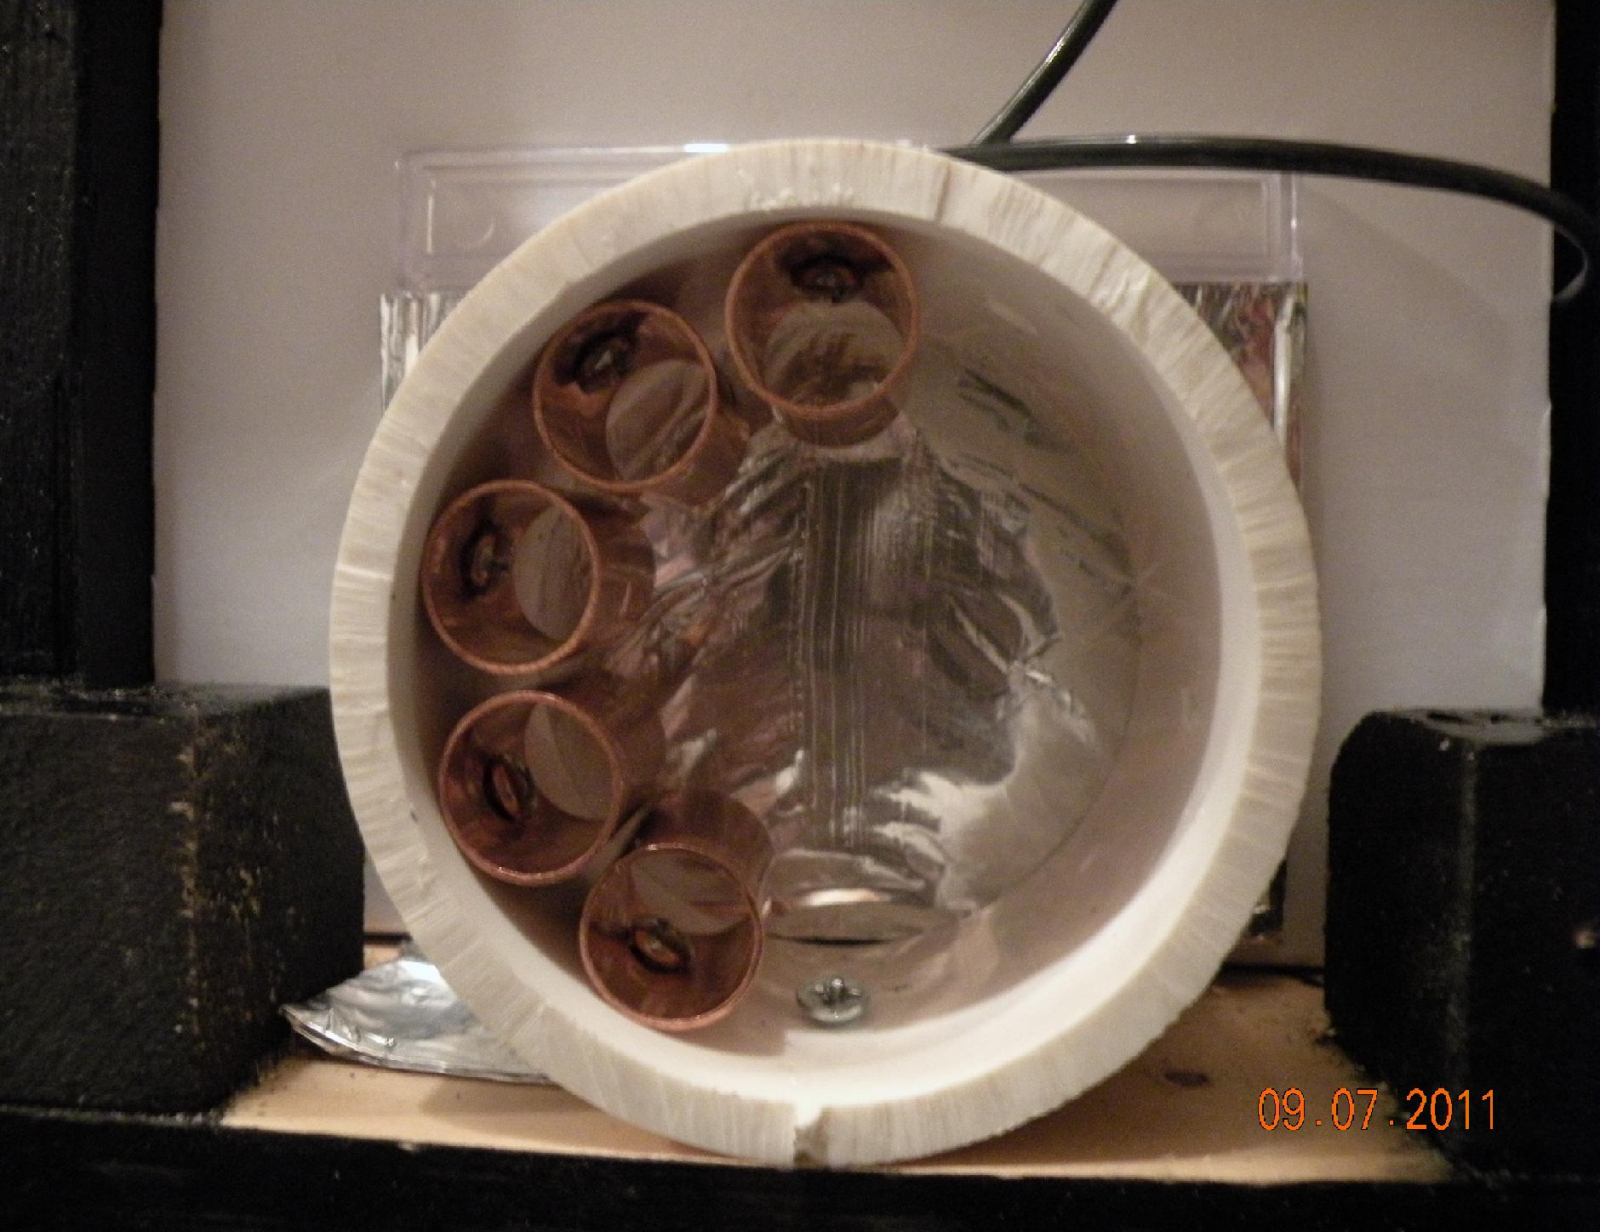
So, once you get your transformer figured out, you need a spark gap. What is a spark gap? The spark gap is a gap that is set to the proper distance to allow the air to ionize once the capacitor has been fully charged by the neon sign transformer. The cheapest and simplest way is to use a few pieces of copper tube spaced a short distance apart to create a multi-gap. The multiple sections allow for better quenching, which is the extinguishing of the spark when the voltage has dropped to the point that we want to begin charging the capacitor again. Just be warned that if you use PVC to mount the tubes on, and run it too long, it can catch on fire.
Now, the next thing you notice in the schematic is the tank capacitor (called that because it stores energy like a tank stores water). Because the capacitor is shorted through the inductor when the spark gap fires, it must be capable of handling hundreds of amps of current. There will also be voltages present much higher than the transformer voltage because of the effects of resonance, so for a 15KV NST, you would need at least a 20KV capacitor, preferably higher.
Those specifications mean that if you can just buy a suitable capacitor, you can probably afford to just buy a tesla coil. For the rest of us, there are cheaper options. If you're willing to pay a substantial amount and do it right, there is the MMC, or multi-mini cap. Basically it's a bunch of capacitors in series to raise the voltage rating, and then a few of those series strings in parallel to raise the current rating. More information about that method can be found here. A MMC can still run you quite a bit of money though, and if you're like me, you're willing to work harder to pay nothing. That's why there's the beer bottle capacitor. The beer bottle capacitor is a form of the leyden jar, as shown here.

The construction is simple, just make up some salt water, pour it in a bottle, stick a wire in it, wrap it in aluminum foil, and repeat as many times as necessary. We will be getting to how many times is necessary in just a bit. For reference, a nice calculator is available here. However, if you try to run a tesla coil off of it, you might notice some purple haze coming off the water or the edges of the foil. That is called corona, which, not surprisingly, leads to what is known as corona losses.
Basically, energy is escaping the system by means of that hazy purple plasma. It might not seem like much, but that haze can be the difference between a working tesla coil, and the worlds largest, coolest looking paperweight (I learned that the hard way). Fortunately, it is easy enough to stop. Simply pour some oil in the bottles, and then put the bottles in a bucket, fill it with saltwater, and cover that saltwater with oil. Any oil will work, but organic oils will decompose eventually and get nasty. I used a $2.00 bottle of motor oil from Wall-Mart. I would also recommend covering the whole thing up, otherwise a moth or two will get stuck in the oil and decompose, and it gets all nasty.
Finally, you've got everything else done, now you just need a good looking topload. I would highly recommend a toroid, for awesome points on the looks, but it's up to you. If you don't want to buy a fancy spun toroid, you can always make one out of dryer ducting and aluminum foil. Pie pans also work, along with metal spheres, or flat discs. Feel free to get creative, but you need to be able to calculate the capacitance, because the toroid actually acts as the capacitor for the secondary.
It acts as one plate of the capacitor, and the earth acts as the other plate, allowing for the creation of the essential resonance. It's also the part that shoots lightning. Because it's very hard to change the inductance or capacitance of the secondary, it's resonant frequency is usually calculated and the primary is designed around it.